Visual Assist provides two efficient methods to locate symbols in your solution:
- Symbols in Solution drop-down in the VA View, which is often visible when editing
- Find Symbol dialog that is opened on demand, and is more powerful than the drop-down
You can use the keyboard or mouse to navigate both methods.
Visual Assist versus Visual Studio
Visual Studio 2017 provides Go-to-Symbol, which is similar to Find Symbol in Solution. Both implementations provide access to all symbols in a solution, but Visual Assist offers the feature in large solutions and supports advanced filtering and sorting.
Symbols in Solution Drop-down
The Symbol in Solution drop-down is the second component of the VA View. The interface to the drop-down is simple and fast, and sufficient if you have reasonable knowledge of the symbol you need.
If the VA View is not open, open it with VAssistX | Tools | VA View or via a shortcut assigned to VAssistX.VAView.

Put focus in the Symbols in Solution drop-down, and type one or more strings to filter the list of all symbols in your solution to include only those containing the strings. Filtering in the drop-down is always case insensitive.
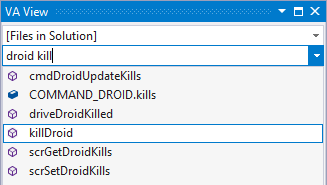
Hover over entries in the drop-down to see definitions and file locations.
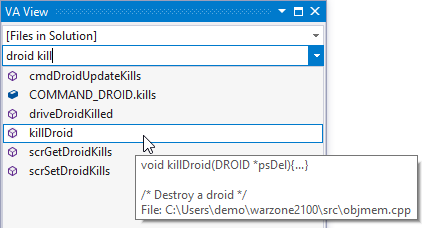
Navigate the drop-down with the keyboard or mouse.
Select a symbol using Enter, or Click, to jump to its definition.
Copy a symbol from your source and paste (Ctrl+V) it into the drop-down to quickly find symbols whose names contain the content of your clipboard.
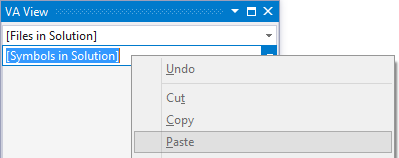
When the drop-down list is open, Copy (Ctrl+C) places the name of the element with focus in the clipboard.
Find Symbol Dialog
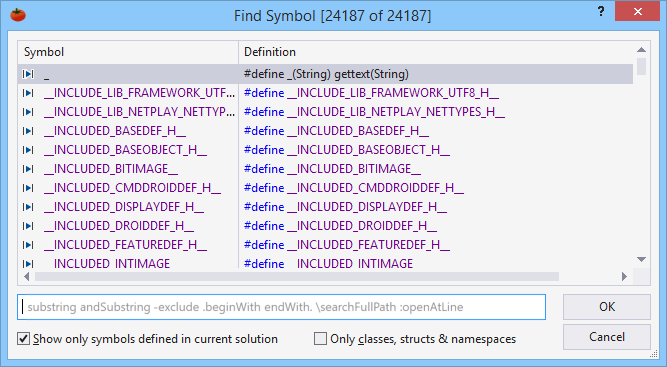
Open the Find Symbol dialog via default shortcut (Shift+Alt+S) or toolbar button to see the same list of symbols with their definitions.

Double-Click a symbol to jump to its implementation.
Filtering in the Dialog
Type a string in the edit field of the dialog to filter the list. By default, Visual Assist selects a symbol whose name begins with the filter. If no symbol begins with the filter, Visual Assist selects the first symbol containing the filter.
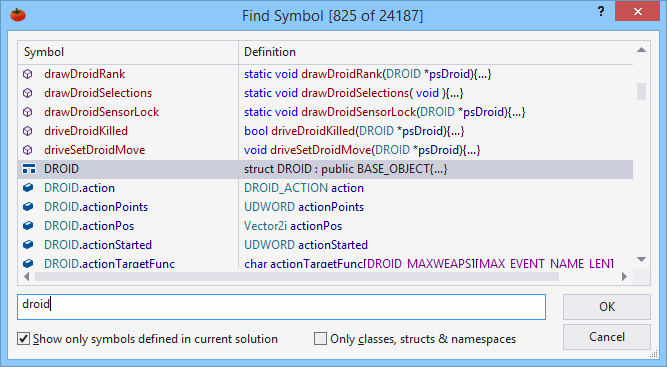
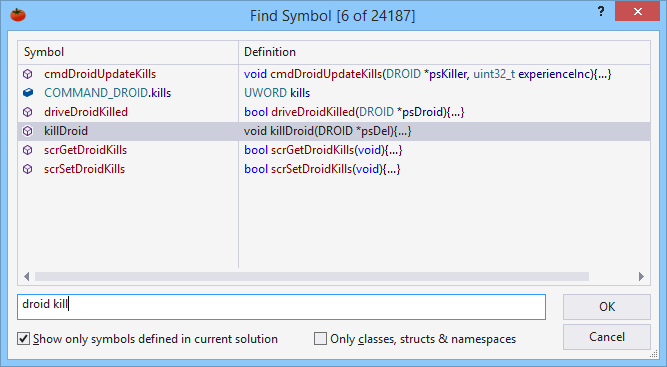
Type unique filters to locate symbols quickly. Type multiple strings to find symbols whose names contain all of the strings.
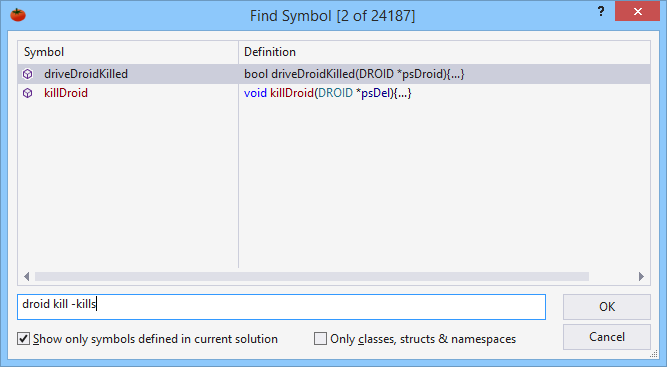
Precede a filter with a hyphen to exclude symbols (negative filtering).
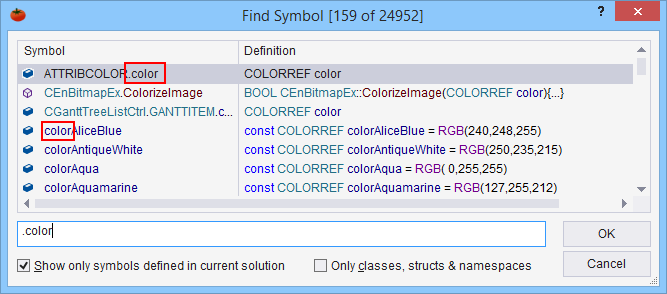
Begin a filter with a dot to find symbols that begin with the filter, or contain the dot and substring. A filter that ends with a dot matches ends of symbols. For example ".color" finds symbols that begin with "color" or contain ".color".
Scope of Search in the Dialog
Toggle the checkbox in the dialog (Alt+S) to restrict the list to those symbols defined in the current solution. If unchecked, the list includes system symbols.

Select "Only classes, struct & namespaces" (Alt+C) to restrict content types and improve responsiveness of the dialog in very large projects.

Context Menu in the Dialog
Right-Click a symbol in the Find Symbol dialog to expose a context menu with several commands and advanced options.
Select "Find References" (Ctrl+F) to launch Find References integral to Visual Assist for the selected symbol.
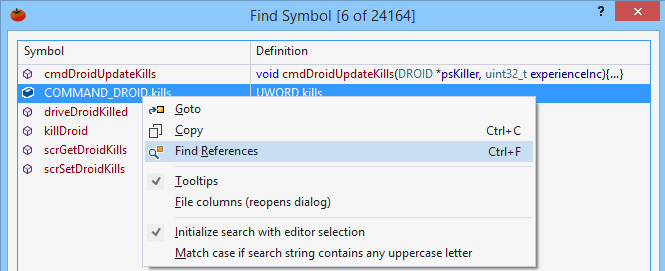
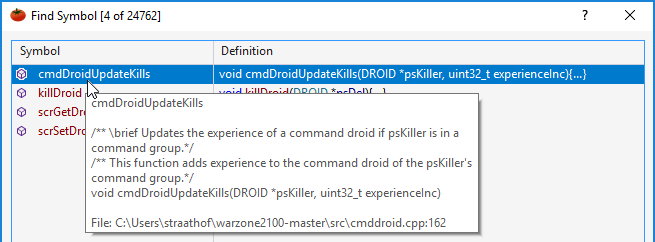
Disable Tooltips to prevent the opening of hovering tooltips that identify file, surrounding code, and directory of symbol definition. (Tooltips will still open to identify values in partially hidden cells.)
Enable "File columns" to show columns containing files and directories. These columns are especially useful if your solution has numerous like-named symbols defined in different locations. Display of the columns does not affect sorting or filtering within the dialog. When the columns are shown, consider disabling the hovering tooltips that contain identical information.

Enable "Initialize search with editor selection" to make the Find Symbol dialog open with selected text as the current filter. Press Undo (Ctrl-Z) to restore the previous filter(s). If there is no selection, the File Symbol dialog will open with the previous filter.
Enable "Match case if search string contains any uppercase letter" to restrict searches to symbols that match the case of a filter string if the string contains any uppercase letters. Without the setting enabled, "foo" matches "foo" and "Foo". With the setting enabled, "foo" matches "foo" and "Foo" but "Foo" matches only "Foo". If you need to find only "foo" with the setting enabled, search for "foo -F"; the negative filter will eliminate "Foo".
Commands in the context menu are not available in the Symbols in Solution drop-down.
Scrolling in the Dialog
Standard scrolling techniques are available in the Find Symbol in Solution dialog when focus is in the list.
Although non-standard UI, when focus is in the filter edit control, Home and End scroll the list if no filter is present. Once you start typing a filter, the Home and End keys move the text caret in the filter edit control, whereas the Up, Down, PgUp, PgDn, Ctrl-Home, and Ctrl-End continue to scroll the list.
Sorting in the Dialog
Symbols are always sorted alphabetically by name. Clicking column headers does not change the sort order
Symbols Included in the Drop-down and Dialog
Visual Assist includes in the drop-down and dialog all symbols likely the target of a search, and excludes inconsequential symbols. Symbols included vary by type, language, and location.
| Symbol type |
Located in
C# file |
Located in
C/C++
header file |
Located in
C/C++
source file |
| Global and namespace symbols (variables, functions, classes, class members, enum names and their items, etc.) |
Yes |
Yes |
Yes |
| #defines |
Yes |
Yes |
No |
| typedefs |
N/A |
Yes |
No |
| Local variables |
No |
No |
No |
Overloaded methods and symbols defined more than once, particularly within #define directives in C/C++, correctly appear multiple times in the drop-down and dialog.
Directory-Based Parsing
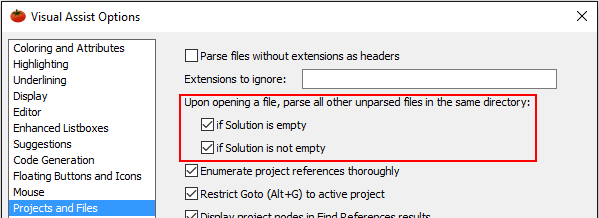
If you use directory-based parsing a file need not belong to a solution to have its symbols exposed to Find Symbol in Solution.
Registry Settings