You can copy or move settings of Visual Assist from one development environment to another.
Follow these steps in your existing environment:
- if you did not specify a location for per-user data, e.g. VA Hashtags, that is accessible to both environments, copy the data
- export Visual Assist settings to a registry script
- optionally, uninstall Visual Assist from your existing environment
In your new environment:
- install Visual Assist to your IDE
- enter your activation key for Visual Assist
- optionally, adjust file paths in your exported registry script
- import your settings by running your registry script
- restore per-user data if not stored in a location accessible to both PCs
Details follow:
If you did not specify a location for per-user data that is accessible to both environments, copy per-user data from %APPDATA%\VisualAssist to the equivalent directory in your new environment.
| Per-user Data Item |
Sub-directory of %APPDATA%\VisualAssist\ |
| VA Snippets |
Autotext |
| Custom filters for the VA Step Filter |
DebuggerTools |
| Custom dictionaries and words |
Dict |
| Recent clipboards |
Misc |
| Contents of the Most Recently Used List in the VA View |
MRU2 |
| Plug-in settings for Source Links definitions |
SourceLinks |
| Global VA Hashtags filters |
VAHashtags |
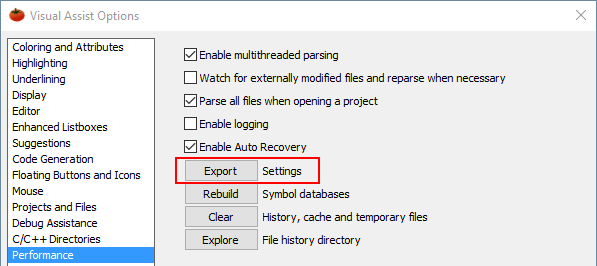
Export your settings via the options dialog of Visual Assist. Your script will be created in the same location as your per-user data. If you specified a location accessible by both environments, you will be able to easily execute your registry script in your new environment. (Don't, yet!)

Edit your registry script with a text editor and adjust file paths to make them apply to the file hierarchy of your new environment.
Exit the IDE(s) in your new environment.
Import your settings by running your registry script. (Note: The script works as-is only when importing to the same version of IDE.)
Start your IDE.
Registry Settings